|
| |
|
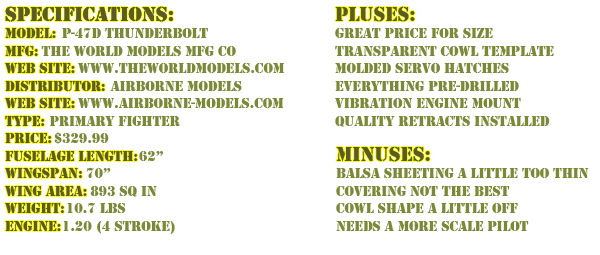
When I first saw The World Models P-47 ARF I was thumbing through one of the many RC magazines that I get! It was being introduced in the new products section of the magazine and my first thought was that's a really good looking model. My next thought was "I have to get this plane" so I contacted the distributor for The World Models here in the US which is Airborne Models (www.airborne-models.com). At first I was told that they had a couple of the P-47's out for review and that they would get back to me. Although I was a little disappointed at first, it wasn't too much later when I got an email asking me where to ship the kit. Now I was really excited!!! |
| |
 |
|
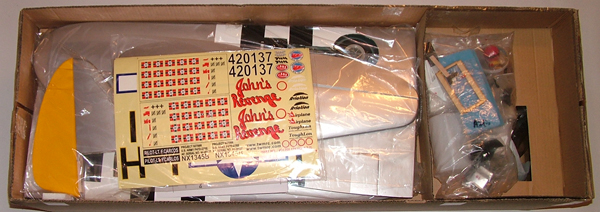
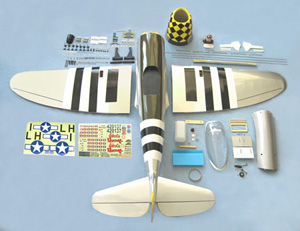
Like most ARF's these days they are all pretty well packaged and The World Models P-47 was no exception. Each of the major components were wrapped in a plastic bag and all the hardware was individually bagged with everything taped to the box so there was no damage when the kit arrived to me. |
|
| |
As I was opening up the box, one of the first things that jumped out at me was the box itself. Most kits come in a very thin flimsy box, but not this kit; the box was made like a Mack truck with very heavy wall construction. After unwraping everything and looking the kit over I was very impressed with some of the features of the construction. The cowl came with a transparent vacuum formed copy to use as a marking template, the servo hatches/mounts were molded plastic, everything was pre-drilled including the canopy, cowl and flight control surfaces. All the flight control surfaces were pre-hinged and a really good set of mechanical retracts were already installed at the factory. The kit also included a vibration isolating engine mount, a pilot figure and even the foam for wrapping the radio gear. These are some pretty nice features, especially when you compare it to other ARF's on the market.
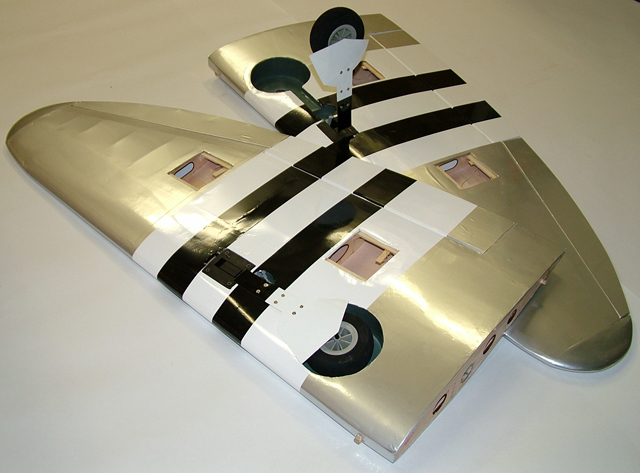
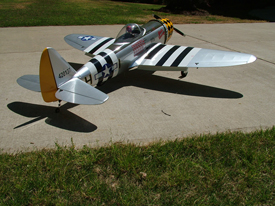
Now this is not to say that the P-47 was perfect, there were a couple of things that I would like to have seen done a little better, but as I laid the plane out on the floor just like the picture above, it became readily apparent that World Models hit a sweet spot when it came to price and features of the kit. With a wingspan of 70" and a price of $329.99 the P-47 is not too big and pricey or too small and cheap, it's a great in between size and the features you get at this price would make any modeler feel like they got a good deal.
|
| |
|
| |
| Construction: |
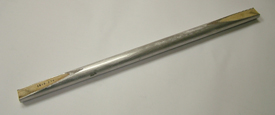
As mentioned above the wings already had the retracts installed but the wheel covers had to be added. They were attached with six (6) nuts & bolts, but since I always seem to have the covers twist on me in flight I added a little six (6) minute epoxy to secure them from twisting. With the ailerons & flaps pre-hinged at the factory all that was left to do was glue the two (2) wing halves together. Instead of using a plywood dihedal brace the P-47 uses an aluminum tube cut so that it is keyed to fit in the wing only one way. |
|
|
| |
| |
|
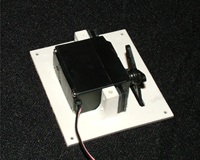
One really nice feature of the kit is the molded plastic servo hatches that were pre-painted to match the covering. With the molded hatches there was no need to have to glue little wood blocks to a piece of plywood, which means there is no chance the blocks will come loose in flight. For me it is the little things like this that I think really make this kit. Once the aileron & flap servos were installed it was time to flip the wing over and intstall the retract servos. |
|
| |
|
| |
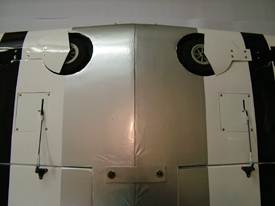
Another feature that I really liked were the wheel wells. Most ARF's in this price range use the standard vacuumed formed wells. The World Models P-47, however, used fiber glass wheel wells that are flush fitting to the wing which makes the P-47 look less ARF like. Adding a set of inner gear doors would transform this ARF into a nice scale model. |
|
| |
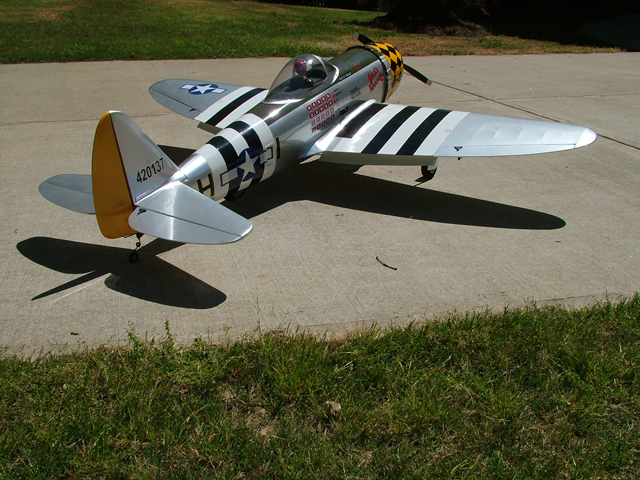
The P-47 came with very good quality retracts already installed at the factory. There was almost no play in them in either the up or down positions. Like most kits with mechanical retracts, the retract servo is usually on the top side of the wing as it is with The World Models P-47. Most, however, are concealed by the fuselage but The World Models P-47 has its retract servos outside the fuselage. Now my first impression was "what an awfull place for the servos". The openings are covered up by small strips of iron-on covering that is supplied with the kit. All through the build I was very frustrated by their position, as I was just sure it
|
|
|
would detract from the appearance of the plane. So when I finally got the plane on it's wheels and was standing a couple of feet away it was hardly notciable where the servos were located. The P-47 will require two (2) low profile retract servos one mounted in each wing half. Having two (2) retracts servos definitly adds a little more cost to building the plane but when you consider how much easier it is to make the retracts operational it more than makes up for it. Just read my other review of the VQ Warbirds AT-6 Texan and you'll see what I mean. |
| |
|
| |
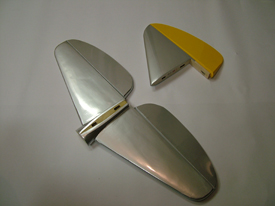
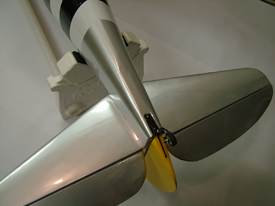
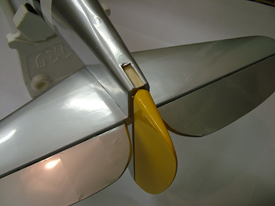
Moving on to the tail assembly, World Models took a slightly different approach to the horizontal & vertical tail planes. Again a nice feature of this kit was that the horizontal and vertical tail planes were airfoil shaped and not the usual flat construction. Instead of sliding the stab through a slot they used a post system that the horizontal stab slid over with the vertical fiting on top of the horzontal. The fuselage fairing is a fiber glass part already assembled and covered to the horizontal stab. This was by far the easest tail assembly I have built as there was much less adjustment needed to get everything square. The whole assembly went together in less than 5 minutes. |
| |
|
|
| |
Installing the tail wheel assembly was very easy as well. The area for the tail wheel assembly already had the covering removed which saved one more step. The tail wheel assembly was also pre-assembled so all that was required to do was apply a little epoxy in the pre-drilled hole in the rudder and slip the tail wheel on. The tail wheel assembly was then secured with two screws. That was it for the entire tail assembly. It took longer for the 30 minute epoxy to dry than it did to mount the tail planes and add the tail wheel. |
| |
 |
|
| |
|
| |
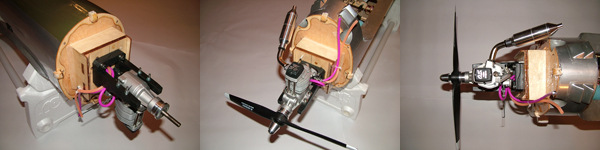
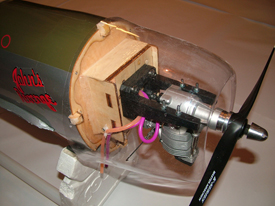
When it came time to install the engine I decided to use a new OS FS-120SIII Surpass four stroke w/ pump that I had from another project I had not gotten to yet. The P-47 included a vibration isolation engine mount with the holes already pre-drilled in the firewall. This was another nice touch, however it was a little on the complicated side to assemble. Since the OS 120 has a rear carborator it did not fit very well with the included mount so I opted for a standard engine mount. In both cases the engine was pushed a little further forward than what the instructions specified. The standard engine mount needed some new holes drilled in the firewall which in turn made it necessary to modify the standard mount to avoid the exisiting firewall holes. Lastly with the engine having a pump it was not necessary to attach the vent line to the muffler, instead I allowed it to hand down next to the fuel fill line. Another slight change I made was I added a second clunck in the fuel tank since access to the carborator line is inaccessable for draining the tank after flight. All in all, however, it was a pretty easy engine installation even with the modifications. |
|
| |
|
| |
|
| |
|
| |
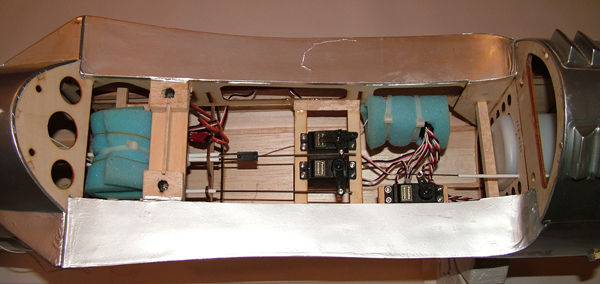
The radio installation was like most ARF's pretty easy, as there was loads of room in the fuselage for all the needed equipment. I did make some modifications in the mounting of the radio gear. First, the original servo tray location prevented the fuel tank from being removed in the event a problem occured. So I moved the servo tray back some to allow for tank removal. What was nice here was World Models had already added the servo screw doublers to the underside of the servo tray and included the foam to wrap the battery and receiver. Next since I mounted the OS 120 inverted the throttle was on the other side of the radio compartment compared to where the instructions indicated so I made a new servo mount for the throttle servo. Having a heavier engine and it being slightly more forward than designed made the P-47 slightly nose heavy, so I mounted the battery pack behind the CG and the plane balanced perfectly.
It was during engine and radio installation that my biggest complaint about the P-47 surfaced. While the plane was sitting on the cradle the fuselage developed several cracks in the balsa sheeting that covered the top of the airframe. This was a result of the cradle pressing up against the plane. Now generally I am pretty careful about things like this so when I checked the balsa thickness I found that the P-47's sheeting was about 5/64" thick. The cracks were glued from the inside and once I hit an iron to the covering it was hardly noticable, however a little thicker sheeting would be a major improvement to the plane.
|
| |
 |
| |
|
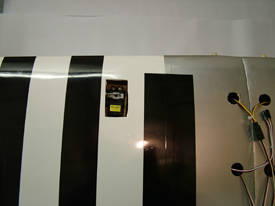
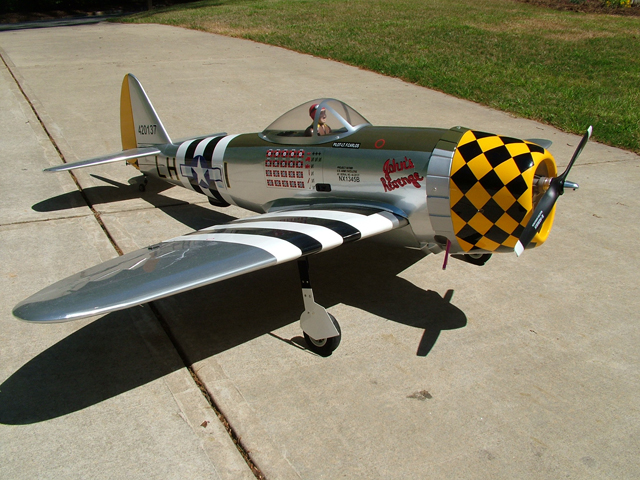
After the major components were installed, it was time to add the scale features. The kit included all the usual items found on a P-47 such as the vents and blisters all vacuum formed. To attach these add on parts the iron-on covering needs to be cut away and then they are glued using CA. Since the inner cooler vents protrude into the fuselage a hole in the sheeting was needed. This was already done at the factory and marked by a small colored adhesive dot to indicate where to cut the covering.
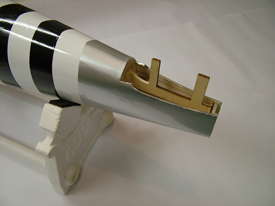
When it came time to mount the cowl and the canopy another couple standout features emerged. First the kit includes a transparent vacuum formed copy of the painted fiber glass cowl. This really helped making the cutouts for the muffler, glow plug opening and needle value without messing up the fiber glass cowl. This alone saved many tedidous tasks normally associated with mounting a cowl. Now that I have experienced this feature it will be hard to go back to the old fashioned way of mounting a cowl. The other really cool feature was that the cowl and canopy were pre-drilled at the factory
|
and matched up perfectly with the mounting points on the fuselage. Then if that was not enough, the icing on the cake was that the mounting hardward included rubber grommets to prevent the cowl and canopy from cracking from the vibration of flight. Now this may sound very insignificant, but lets face it, all of us have either drilled one too many holes or had a canopy crack and fly off at least once. The last thing that needed to be done was to apply the graphic stickers to the plane and she was ready for balancing and first flight. |
| |
|
| |
|
|
| |
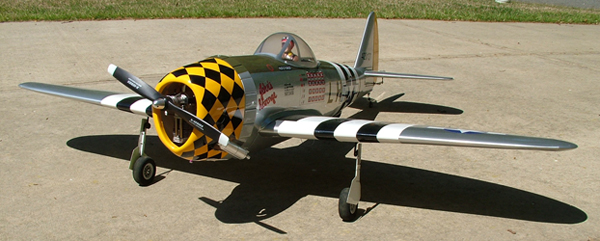
The World Models P-47 is a good quality, easy to build plane at a reasonable price. Many of the features included make this plane shine when compared to other ARF's in its class. I really enjoyed putting this plane together and think it would be a good starting point for those who like to dress up their ARF's a little. I would like to see World Models make some ehancements like thick balsa sheeting even at the expense of some other features like the vibration isolating engine mount or even the box the plane ships in.
To add even greater appeal having a more scale looking pilot would go a long way in making this plane look like the killer it was in the war. It would also be nice either included or as an option to have a drop tank and bombs. Having fully sheeted surfaces would make the P-47 a great RTC plane to either glass and paint or cover in your own scheme. All in all I was very pleased with the P-47 and any improvements would make this plane even nicer.
The World Models P-47's size makes it a great plane to step up from smaller 60 size warbirds, and the price to feature ratio is outstanding. The World Models P-47 is definitely worth a look if you are in the market for a good quality ARF that won't break the bank in the process. |
| |
|
| |
Stay tuned for the flight report!!! |
| |